3d Illustrations for Scientific Articles
In one of my latest publications I took some of my illustrations to the next level. I used 3D software to illustrate some of the key aspects of the soil erosion model I have developed. In this blog post I will tell some about the software I used and some experience I got with making 3D illustrations.
In almost every article I have written so far, I try to include a figure to illustrate some key aspects or conclusions of the study. These kind of figures are called explanatory diagrams, but I will refer to them as illustrations. Read this blog post for an in-depth explanation of scientific illustrations and some useful tips how to make them. In previous papers, I used 2D software, such as Inkscape and Gimp, which served the purpose. But when I was working on an illustration of a hillslope with a river and some trees, I just got stuck. I was trying to illustrate something that is essentially 3 dimensional, with software that is very good, but limited to 2 dimensions.
So I was figuring out, I can downgrade my expectations and make an illustration in 2D or take up the challenge and learn something new. Well, I always go for the steepest hill, so I took up the challenge. I quickly found Blender, an open source 3D software package that can be used to make some awesome 3D graphics. When I opened Blender for the first time I was in shock. The interface is way more complicated and far less intuitive than the 2D software I was used to. So, I started a tutorial at CG Cookie to learn some of the basics of 3D modeling and to learn how to use Blender. At CG Cookie they offer several workflows, which cover the most fundamental parts of Blender. I only followed the workflows related to modeling, shading, lighting, texturing and rendering. Other workflows are of course interesting, such as animation and dynamics, but were not essential for me to be able to make a 3D illustration of a hillslope.

Some more inspiration I got from this tutorial that shows how to make a low poly illustration in Blender. A low poly illustration is made up of a few polygons, which is less time consuming to make, but still looks nice. Low poly illustrations do not require textures, but only colors, which also saves time. Sketches in scientific articles do not have to be photorealistic. Low poly illustrations are therefore a quick alternative for making simple 3D sketches.
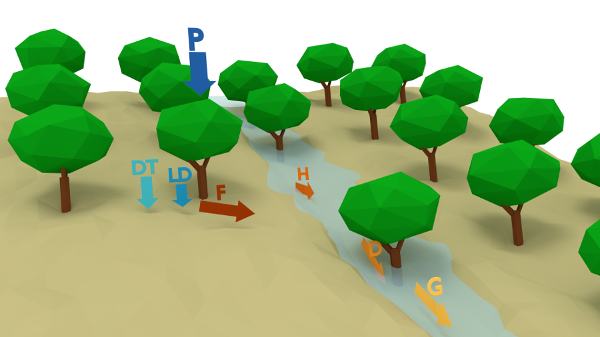
When I was working my way through the hillslope sketch, I got some more ideas of making other sketches as well. At the end, I made another 4 sketches: the soil erosion processes on the hillslope, the hydrological processes (which was more like a 2D sketch), different types of roughness and some catchment-scale processes. When I finished rendering the images for the article I was writing, I got the idea to also make a video out of it. To make that happen, I did the CG Cookie tutorial on animation, to learn how to animate the movement of the camera. See the resulting video abstract below.
I am very satisfied with the 3D illustrations I have made with Blender. I think I spend some considerable time learning the software, that is a big drawback. But once I got the hang out of it, I did not spend more time on the actual illustrations than I spend on making 2D illustrations. So if you want to take your scientific illustrations to the next level, I highly recommend to learn how to make them with 3D software.